Installation process of CentOS 7 64-bit.
Insert the CentOS DVD and boot your machine with the cdrom. You will get the below screen.
Select "Install CentOS 7" and Press Enter
Select "Install CentOS 7" and Press Enter

Next Select the Language as per your preference and click on "Continue"

The Next screen completely new as compared to earlier releases of CentOS. Now you have to work on all the thumbnails you see on this screen one by one. So lets start by adjusting "Date and Time"

Next you will get the below screen where you can select your continent and click on "Done"

I am skipping the "Language Support" and "Keyboard" as it already shows English(US) which we had opted for in the earlier options above.
You will come back to your previous screen where you can select the next thumbnail to edit. Lets go to "Software Installation"

Here you will find a bunch of pre-defined groups of packages which you can select as per your environment. Select any one "Base Environment" and in case you want any add ons the same can be selected from the left panel as shown below. Once selected click on "Done" to go back to the previous screen.

Next lets configure our partition using "Installation Destination"

Now in my case I am using simple internal datastore to install my OS. But in case you want to add any iSCSI Target, Click on "Add Disk" and add the iscsi target details. For now we will skip those details.
Select the disk where you want to continue the installation. As you see a "check mark" is visible once I selected the disk.
Make sure you have checked the box "I will configure partitioning" or else the image will automatically create partitions for you.
Click on "Done"

Since you opted for manual configuration of partition the next screen will ask for the type of partition you want to create. Here you can select
LVM,
Standard Partition,
BTRFS,
LVM Thin Provisioning
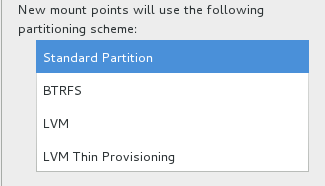
As for now we will select "Standard Partition" and click on "Done".

Click the "+" button as shown above and create a new "Mount Point". Assign 200MB of space to the partition

By default "XFS" filesystem is selected for any partition you create. Let us change that to ext4 as shown below and update the settings. The list of available options for filesystem is as shown below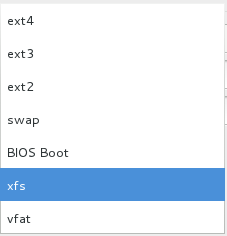


Similarly create any other mount point as per your requirement.

So as you see we have created /boot, /var, /, and swap partition with ext4 filesystem. Lets click on "Done" as we are done with the partitioning.

Next lets configure the "Network and Hostname"

Turn "ON" the ethernet device connected to your machine and click on "Configure" to configure the network settings
Also change the "hostname" as per your environment
Also change the "hostname" as per your environment

Change the Ethernet device or else you can skip that part. Next configure you IP details as per your environment i.e IPv4 or IPv6. We are using IPv4 so selected the "IPv4 Settings" and added the IP, Netmask,Gateway and DNS details in the same.. Click on "Done" to save the configuration and go a step back.

So we are done here with all the options on this screen so we can "Begin Installation"

As you see the installation has begun in the mean time you can add a password for your root user. Also you can create additional user by using the "User Creation" thumbnail.

As you see I am providing my root password below

Once the installation is finished, Reboot the machine.

Once the machine reboots, next it will prompt the below screen. Click on "License Information"

Accept the "License Agreement" and Click "Done"

Next you will return to your previous screen . Here you can create a user which will be used to login for the first time

Provide the user details and Click on "Done"

Continue the configuration step and Next you will get the Kdump configuration page.
Let us enable the Kdump and let the machine decide the amount of memory required for the same.

Select the "Language" you prefer

Provide your Location details

In CentOS 7 this new feature is added where you can connect to your Cloud if you have any existing account. Well we don't have to lets skip this step

So looks like we have completed all the step and here it says our Installation and Configuration is completed.

Below is the Login Screen which we get once everything is completed

Hope You will enjoy.
Other links you may like
Other links you may like
hii very nice information. I visit your site daily and got inspired from you and started creating my own blogs : https://techgigi.com/samsung-made-fighter-jet-smartphone-tv/. Hope you will like my content. Keep updating your blogs :)
ReplyDelete