Friday, May 20, 2016

Create Table in SQL Server 2014

These are the steps to create a table in a SQL Server 2014 database using SQL Server Management Studio (SSMS).

Ensuring you have the correct database expanded (in our case, the TaskTracker database), right click on the Tables icon and select Table... from the contextual menu:

A new table will open in Design view. While you have this screen open, do the following:
Using the values in the screenshot, complete the details in the Column Name column, the Data Type column, and Allow Nulls column.
Make the TaskId column a Primary Key field by right-clicking the button next to TaskId (i.e. the same area where the key appears in the following screenshot) and selecting Set Primary Key.
Make the TaskId column an identity column by setting Is Identity to Yes (you can find this option under theIdentity Specification section in the bottom pane). Note that to set values in the bottom pane, you need to select the column name in the top pane first. We're setting this column to be an auto-number column - it will automatically generate a new number for each record that is created.
Set the Default Value of the DateCreated column to (getdate()). (This will automatically insert the current date into that field for each new record).

What we are doing is creating the column names, specifying the type of data that can be entered into them, and setting default values. Restricting the data type for each column is very important and helps maintain data integrity. For example, it can prevent us from accidentally entering a task name into a field for storing the current date. SQL Server will prevent data from entering tables where the data doesn't adhere to the rules that we've set for each column.
Save the table by selecting File > Save Table_1 or by right-clicking on the Table's tab and selecting Save Table_1 from the contextual menu:

When prompted, name your table (we'll call it Tasks):

Your New Table
Now that you've created a new table, it will appear under your database in the Tables section. If you don't see it immediately, try refreshing the Object Explorer. You can do this by right-clicking on Tables and clicking Refresh from the contextual menu:

Here's a screenshot of the table with the Columns folder expanded:

2

Thursday, May 19, 2016

Create Database in SQL Server 2014

Now that we've opened SQL Server Management Studio, let's start by creating a database.
For this tutorial I'll be creating a database to track tasks. It can be used as the backend of a task-tracker application. I'll give the database an obvious name like "Task Tracker" so I know what it's used for. This will help distinguish this database from the other databases - especially if one day I end up with say, 10 or 20 databases in my SQL Server Management Studio (which would probably be a small number for some DBAs).
Creating a database can be done by running a SQL script or by "point and click". Here we'll use "point and click". But first, let's look at the system databases.

System Databases
When you install SQL Server, the following four databases are created.

master
This database stores system level information such as user accounts, configuration settings, and info on all other databases.

model
This database is used as a template for all other databases that are created.

msdb
The msdb database is used by the SQL Server Agent for configuring alerts and scheduled jobs etc

tempdb
This one holds all temporary tables, temporary stored procedures, and any other temporary storage requirements generated by SQL Server.
These are system databases and each of them are there for a specific purpose. When we create our own database, the database will be created based on the model database (above). That database provides the template for any new database that you create.
How to Create a New Database
The following steps demonstrate how to create a database in SQL Server 2014 using SQL Server Management Studio.
From the Object Explorer, right click on the Databases folder/icon and select New database...:

Name your database (I called mine TaskTracker) and click OK:

No more steps... you're done!

Your New Database
Your new database will appear under the Databases section of the Object Explorer (just under the System Databases folder). Here's mine:

As mentioned, the new database is based on the Model database. The Model database is a system database which is used as a template whenever a new database is created. If you use the left pane to navigate to your database and expand the tree, you will notice that your database already contains a number of objects. For example, it already contains system functions, system views, system stored procedures, and (hidden) system tables. These are system objects which provide information about the database.

Other Options
We have just created a database using the default options. When we created the database, a data file and a transaction log were created. They were created in the default location for our server.
If we'd wanted to, we could have specified a different location for these files at the time we created the database. We could also have changed other specifications, such as whether to allow the file to grow automatically (as it stores more and more data), and if so, how that growth should be managed.
Many of these options can be changed via Database Properties, which can be accessed by right-clicking on the database and selectingProperties:

The Properties dialog contains a large number of options for changing the configuration of your database. Clicking on the various items in the top-left pane will result in their respective options being displayed. For now, we'll leave everything at its default setting.

3

Create Multiple Instance in SQL Server 2012

SQL Server 2012 Multi Instance Creation

The next screen asks us what type of installation we want to perform. Although it may not be the most obvious choice, select New SQL Server stand-alone installation or add features to an existing installation.

The installation will now run the Setup Support Rules wizard to ensure that everything is good to go.

Upon completion it will report what issues, if any, were found and give a detailed report if you wish to view it. Click OK when you are finished looking the information over.

The installation will then search for the latest updates. You may choose to skip this scan and check for updates later. Click Next >.

We are going to create a new SQL server instance, so select the Perform a new installation of SQL Server 2012 and click Next >.

Enter your license key. Unless your organization requires something different for licensing compliance, his should be the same key as the license key for the original instance of SQL server installed.

The next box in the installation wizard is the EULA. Read and if you accept the license terms click Next >.Here you also have the opportunity to send Microsoft usage data for analysis.

The next option depends on your environment and what you require from this SQL server installation. For the scope of this article, All Features With Defaults is selected. Click Next >.

The Feature Selection page lists all of the components that are going to be installed. Because we selected All Features With Defaults absolutely all of the options will be selected. Again, make sure that you select the options you require from creating this SQL server instance. Extra options will just slow the server down by requiring more resources. Click Next >.

The wizard runs through another rule check. This time it is for the Installation Rules. This screen, like the previous checks, will give information about the check and allow you to see more details if there is something that needs to be fixed. Click Next >.

Finally we are that the part of the installation wizard where we can name our new SQL server instance. This should be something informative and easy to recognize. Remember, you will be using this name to access the instance you create. For the purpose of this article, I will create the SQL server instance named New_Instance. Click Next >.

Disk space requirements are then checked against what the installation requires. This is not the size of your database. You will need to allow sufficient space for your databases to grow comfortably. ClickNext >.

The Server Configuration dialogue box will allow you to configure what services of this instance you would like to automatically start. Change all of the services allowed to Automatic. Click Next >.

For the database engine configuration, I have chosen to use Windows Authentication Mode. You may choose to use mixed mode if you wish. Click the Add Current User button to add the user you are logged in as, or the Add… button to add a specific account for this purpose. Once complete, click Next >.

The next window is for the analysis services configuration. Again, click the Add Current User or theAdd… button to select a specific account for this service and then click Next >.

As the reporting services configuration is out of the scope of this article, select the Install Only radio button and click Next >. This service can be configured at a later time.

For the distributed replay controller we will again click the Add Current User or the Add… button to select a specific account for this service and then click Next >.

In the Controller Name textbox on the distributed replay client box, type something informative. In this case I chose to use New_Instance_DRC. Select an appropriate working directory and result directory by clicking the ellipses (…) button to the right of the fields. These should be directories that will easily be recalled. Click Next > when complete.

On the Error Reporting dialogue box, select whether you would like to send Windows and SQL server error reports to Microsoft. I left the box unchecked as this is a test server. Click Next >.

Finally, we are at the last rule checking window. This part of the installation wizard will ensure all of the previous information entered will allow the installation for the new SQL server instance to complete successfully. Click Next > after reviewing any required information.

Our Ready to Install dialogue box gives all of the information we used to create the SQL server instance. At this point, review the information ensuring that it is correct and click Install.

The install will take some time depending on the resources available to the box. Although it is not required, an after-hours or low traffic period would be preferred to lessen the impact on the production environment.

After some time, we are presented with the final window for the installation wizard. This box will give the status of every step in the process. Click the Close button after reviewing any pertinent information to end the SQL server instance installation wizard.

Accessing the new SQL Server Instance
Accessing the newly created SQL server instance is as easy as adding the instance name after the server name. For example, our installation is localhost\New_Instance or <server_name>\<instance_name>.
Open the SQL Server Management Studio from the Windows Start menu.

When the Connect to Server dialogue box opens, type the server name and instance. Again, for this article we would use localhost\New_Instance and Windows Authentication.

In the left pane we can now see that we are connected to our new, running SQL server instance. From here we can manage it just as we would manage any other single SQL server.
3

Install SQL Server 2014 Management Studio

How to install SQL Server 2014 Management Studio
The window for choosing directory to which the extracted files will be saved is shown. After choosing the directory click the Ok button and extraction will begin

When the extraction is completed, it’ll take a couple of seconds until the SQL Server 2014 setup processes the current operation. After that, the following window will open:

 This is the primary installation screen and the other SQL tools installation can be started here as well. If not already selected – select the Installation tab in the top-left corner of the SQL Server Installation Center.
For installing SQL Server Management Studio alone, select the New SQL Server stand-alone installation or add features to an existing installation option (as in the screenshots above).
Once the installation wizard starts the SQL Server Installation Center can be closed.
 It’ll take a couple of seconds for the setup rules to be checked (pre-requisites on the operating system). If all the requirements are meet, the SQL Server 2014 setup will start with the License Terms tab as a first step:

To proceed with the installation, read the license terms and then check the I accept the license terms checkbox. The CEIP (Customer Experience Improvement Program) checkbox is optional, but if it’s checked, the program will be able to collect information about the computer hardware and how the product is being used (without interrupting users); the next releases of SQL Server are upgraded based on this information.
After checking the I accept the license terms, the Next button can be clicked to proceed.
The next step is the Global Rules. Setup Global Rules identify problems that might occur when installing SQL Server 2014. Which rules are those in some extent depends on which operating system you are installing to but usually include the following:
Whether the logged-in user is a system administrator with appropriate privileges (a must be)
Whether there are any reboots pending from other installers
Whether required .NET components are available
Whether there is support for long pathnames where the installation media resides
The consistency of any SQL Server Registry keys
If all the rules are passed, the Global Rules step will be processed and skipped automatically. If some rules don’t pass, you must correct these in order for setup to be able to continue:

Most of the known issues are elaborated with solutions and workarounds on the Microsoft forum
The next step of the setup is the Microsoft Update. It’s optional and whether you select it or not, the installation will be able to proceed after clicking the Next button.
Once checked this option gives the opportunity to download the update and incorporate it with the installation. This action will take some time, as those updates need to be downloaded as well.
If you proceeded without checking for updates or it is checked, but there aren’t any updates available, the Product Updates step will be skipped:

It’s recommend that the Microsoft update option is checked to ensure all patches are applied.
Install Setup Files and Install Rules steps are automatically processed. However, the Install Rules is yet another step where the setup wizard is checking if certain software requirements are met:
Need for reboot in order for changes to apply
Whether there are some previous releases of SQL Server
Validation of SQL Server registry keys
Whether the computer is a domain controller
Security settings
Every rule in the list has a status (whether it’s passed or failed); clicking those links provides additional information if something went wrong.
One rule that will almost certainly throw a warning is Window Firewall. This issue specifically can be solved by adding SQL Server and its features to Windows Firewall exception list. Otherwise, SQL Server Management Studio is unable to connect to remote servers.
If some of these don’t pass, they must be corrected in order that setup can be continued:

Additional information for solving certain issues with the Install Rules can be found on Microsoft SQL Server forum
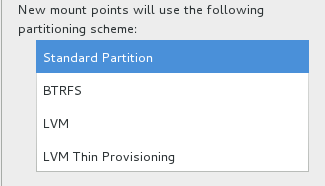
In Feature Selection step the only options that needs to be checked in order to install SQL Server Management Studio is Management tools – basic and sub item: Management tools – Complete, however, SQL Client Connectivity SDK will be installed by default, whether you checked it or not.
Each feature has prerequisites which are shown in the Prerequisites for selected features field located right of the Features field, and if some are missing, those will be installed along with SQL Server Management Studio:

After you proceeded on the Next button, Feature Rules and Feature Configuration Rules steps will be processed automatically if all the Feature Rules are met:
Prior Visual Studio 2010 instances requiring update
Microsoft .NET Framework 3.5 Service Pack 1 is required.
You must repair failures for the installation to be able to proceed.
The update required for Visual Studio is contained on the SQL Server installation media and it’s named VS10sp1-KB983509.msp.
The Microsoft .NET Framework 3.5 Service Pack 1 can be found on this link.
When all the rules are passed and the Feature Rules and the Feature Configuration Rules steps are processed automatically, the installation process will start in Installation Progress step.
 The SQL Server Management Studio installation process should take no more than approximately 4 minutes if there is no actual server installed on the machine After the installation process is completed, the last step of the installation wizard will be presented:

If you’re installing SQL Server Management Studio on the machine on which there is a previously installed SQL Server, there will be minor differences and an additional step in the installation process:
First step will be the Global Rules instead of License Terms.
After the Install Rules are passed, the additional step – Installation Type – will be next:

As SQL Server Management Studio is a shared component and it is installed as a feature of SQL Server, but can also function as a stand-alone application (not as a feature of a specific server), it’s up to you how will you install it, because it’ll work either way.
Just note that if you select Add features to an existing instance of SQL Server 2014, you must define instance to which you’re adding feature in the drop-down list below the second radio-button
The final difference is that instead as a first step, License Terms will follow the Installation Type. In order to proceed with the installation, read the license terms and then check the I accept the license terms checkbox
4

Sunday, May 1, 2016

Installation process of CentOS 64-bit

Installation process of CentOS 7 64-bit.

Insert the CentOS DVD and boot your machine with the cdrom. You will get the below screen.
Select "Install CentOS 7" and Press Enter

Next Select the Language as per your preference and click on "Continue"

The Next screen completely new as compared to earlier releases of CentOS. Now you have to work on all the thumbnails you see on this screen one by one. So lets start by adjusting "Date and Time"

Next you will get the below screen where you can select your continent and click on "Done"

I am skipping the "Language Support" and "Keyboard" as it already shows English(US) which we had opted for in the earlier options above.
You will come back to your previous screen where you can select the next thumbnail to edit. Lets go to "Software Installation"

Here you will find a bunch of pre-defined groups of packages which you can select as per your environment. Select any one "Base Environment" and in case you want any add ons the same can be selected from the left panel as shown below. Once selected click on "Done" to go back to the previous screen.


Next lets configure our partition using "Installation Destination"

Now in my case I am using simple internal datastore to install my OS. But in case you want to add any iSCSI Target, Click on "Add Disk" and add the iscsi target details. For now we will skip those details.
Select the disk where you want to continue the installation. As you see a "check mark" is visible once I selected the disk.
Make sure you have checked the box "I will configure partitioning" or else the image will automatically create partitions for you.
Click on "Done"

Since you opted for manual configuration of partition the next screen will ask for the type of partition you want to create. Here you can select
LVM, 
Standard Partition, 
BTRFS, 
LVM Thin Provisioning

As for now we will select "Standard Partition" and click on "Done".

Click the "+" button as shown above and create a new "Mount Point". Assign 200MB of space to the partition

By default "XFS" filesystem is selected for any partition you create. Let us change that to ext4 as shown below and update the settings. The list of available options for filesystem is as shown below


Similarly create any other mount point as per your requirement.

So as you see we have created /boot, /var, /, and swap partition with ext4 filesystem. Lets click on "Done" as we are done with the partitioning.

Next lets configure the "Network and Hostname"

Turn "ON" the ethernet device connected to your machine and click on "Configure" to configure the network settings
Also change the "hostname" as per your environment

Change the Ethernet device or else you can skip that part. Next configure you IP details as per your environment i.e IPv4 or IPv6. We are using IPv4 so selected the "IPv4 Settings" and added the IP, Netmask,Gateway and DNS details in the same.. Click on "Done" to save the configuration and go a step back.

So we are done here with all the options on this screen so we can "Begin Installation"

As you see the installation has begun in the mean time you can add a password for your root user. Also you can create additional user by using the "User Creation" thumbnail.

As you see I am providing my root password below

Once the installation is finished, Reboot the machine.

Once the machine reboots, next it will prompt the below screen. Click on "License Information"

Accept the "License Agreement" and Click "Done"

Next you will return to your previous screen . Here you can create a user which will be used to login for the first time

Provide the user details and Click on "Done"

Continue the configuration step and Next you will get the Kdump configuration page.
Let us enable the Kdump and let the machine decide the amount of memory required for the same.

Select the "Language" you prefer

Provide your Location details

In CentOS 7 this new feature is added where you can connect to your Cloud if you have any existing account. Well we don't have to lets skip this step

So looks like we have completed all the step and here it says our Installation and Configuration is completed.

Below is the Login Screen which we get once everything is completed

1